Modern Video Production Practices
Video production is the process of video creation through the capture of moving images (videography), creation of combination, and parts reduction of this video in live production and after production (video editing).
 More often than not, captured videos are usually recorded on electronic media. For example, video tapes, hard disks etc. Video may also be distributed electronically without the need for recording. This can be equated to film making, but, with images electronically being recorded instead of making a film stock.
Types of videos
There are many types of videos when it comes to the video production arena. They can be discussed as follows:
Corporate Videos
The kind of corporate video production businesses crave, involve a wide array of purposes, ranging from corporate communication, Education and training. Videotaping conventions and conferences, etc. A popular kind of corporate shoot is understood as, a ‘Happy face’; or ‘Candids’ video. In such a video, a video crew covers a multiple day event, including speakers, award ceremonies, breakout sessions and local recreational activities, where the conventions get to participate. The on-site editor then proceeds to create a short video presentation that is shown to before closing the convention. Many associations grab the opportunity presented by the conventioneers and conduct interviews of their various principals, hence setting a green screen or a different background in a separate room.
Training Videos
These are videos commissioned by organizations in a bid to make changes or promote the workforce. This is at times varied throughout the organization, that is, from training the employees in need of training in simple and repetitive tasks, to the top level executive training.
Training videos really come into their own when large organisations need to ensure optimal health and safety in their workplace.
It doesn’t take long to realise that people are an organisation’s greatest asset and engaging health and safety training videos help them protect these precious assets.
Health and safety training videos ensure that key messages are received and understood by employees which results in a safer workplace.
Additionally, organizations purchase or even hire generic training videos in order to cut down costs. Examples of such videos include; time management, first aid, sales skills team building etc.
When it comes to health and safety training in Blackpool, video is the next best thing to a real life training class.
Marketing Videos
These are videos which are usually used to promote an organization’s product like office water coolers, or promote awareness about the existence of the organization among the targeted consumer market. Marketing video production varies from television advertisements to the creation of internet commercials or viral videos.
Video Filming
Video filming is a the core part of video production, if this part is carried out unprofessionally, the end video product will not be as good as it should be. This part involves a wide range of activities, that is, from camera selection to ensuring good sound quality. In this section, we will discuss how video filming should be conducted. The following process should be followed to the letter:
Tips on selecting a camera
Digital camera. A digital camera should be the way to go. This is because it will make the entire editing process extremely easy.
Mic port. As you select your camera, ensure that the camera has a plug in slot for a microphone.
Picture Quality. If you or the event organizers need HD videos of the event being organized, it may be a good idea if you bought an HD camcorder (valued at $800). However, if you can settle for less than HD video Quality, you may go for the non HD camcorder (valued at $300).
Useful ideas on conducting your Camera work
Film every shot that you have. Once everyone is settled down and is doing what they are supposed to, start taking shots. Take as many as you can. It is usually easier to do this several times. Try and take at least three shots of every occasion.
Try keeping your film shots simple. When you keep zooming, dallying, and panning, you will make your film shots too complicated and if you do this, your audience will not like your shots, or will get sick of them. If possible, you should try as much as possible to not move anything as you make your shots. However, if you really feel that you must give your shots something on the side to make them uniqte, do it, film is cheap, but do not forget to first take your simple shots first. You can then later edit view it as you are editing.
Use a tripod if you have one. Although you may think you are steady, your video will come out shaky in the end. When you use a tripod, you make a huge difference regarding the steadiness of your shots. However, if you want to include a certain sense of uneasiness in your skit, you can either carry it for a while or tilt it a little on one side.
Ensure that there is continuity in your shots. If you are in the middle of a skit, you should make sure that there is someone who will be on the look out and ensure that nothing changes from one shot to another. For example, an individual in a conversation should not be seen to change his pose without the camera capturing it.
You should also take advantage of close ups. As you are shooting, you do not have to show the whole image of the less important part to be focused on. For example, if a person is leaning on the wall of a building, you do not have to shoot the entire building, you can shoot just a part of it and leave the rest in the background. Your audience will get it.
Helpful Reference Links: Video Production on Wikipedia | Film Making 101
Taking the shot
Rule of thirds. This applies to both videos and photographs. Put your imagination into a screen that is divided into thirds, both vertically and horizontally. Where the lines intersect, is where your major point of interest should be. For instance, if you have a long shot, and you realize that you have an individual’s entire body in the shot, his or her body should be more aligned to either the right or the left third, and their head intersects at the upper third. If you have a close up of an individual’s face, his or her eyes should be in the upper third.
Frame your shot using the environs. Use the surroundings to better frame your shot. You will realize that, during conversations, shots are usually framed by the head and the shoulders of the individual that is not speaking. You may use buildings, trees, or anything else to make your border.
Make use of a sequence. In either a newscast or a skit, you can decide to begin with a long shot so as to establish your scene. You should also try making variations between close ups and mid shots. You can also go for long shots if you find it necessary.
Height level of the camera. While you can create a general artistic film by shooting your video from above or below a person, It is generally a good idea to shoot from the eye level of the individual being filmed. Most video production companies find this approach extremely worthwhile.
Lighting
The three set points up. This is the simplest and most common type of lighting. There is a key light Which is the brightest. This is placed about 30 degrees to either the right or the left of the subject, and about 30 degrees above, ensuring the nose shadow does not touch the lips. If the filming is conducted outside, the sun can act as the key light. After the key light (less bright compared to the key light) is the fill light this is used to soften the shadows on the subject. It is placed 30 degrees on the other side of the key light and on the same level as the eyes of the subject. Finally, the backlight should go behind and above the subject, and points down on them. The back light separates the subject from the background by putting light on them.
Traffic Light Suppliers Shoot
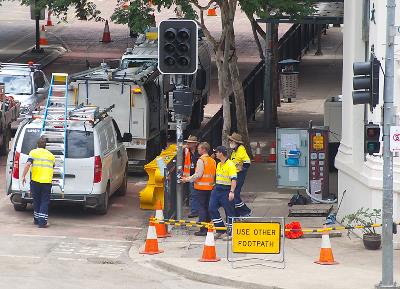
An interesting case in point was a location shoot once carried out by a colleague of mine for a highway authority project. You might think that something as common and ordinary as a set of traffic lights would be easy to light before filming commences. Well in this particular shoot, there were a number of technical difficulties to overcome with the traffic signals before filming could continue.
Despite the involvement of a group of traffic light suppliers who possessed great expertise in their field, none of them could find solution to the issue of filming the traffic lights in overcast conditions. The moral of this particular story is that advance planning is vital to ensure maximum productivity when the shoot takes place.
The sun in front. You should avoid filming when the sun is behind the subject. This is because it is very hard to do this correctly.
Effects. When you are filming in the dark, you should use a less intense but more diffuse key light. If interested in setting a mood, you should try and change the color or position of the key light accordingly. For example, if you want to create a feeling of uneasiness, place the key light low to the ground.
Sound
Selecting a microphone. Different kinds of microphone are better suited for different settings. Where it is okay for a microphone to be seen, a unidirectional (you have to speak into it) microphone is the best. Where a microphone should be hidden, use a cardioid mic (picks up pattern as the picture shows) or omnidirectional (picks up sound in all directions.
The use of a microphone. Always use an exterior microphone; this is because the microphone on the camera does not work well. If the microphone should not be used, you can tie it with a broomstick and dangle it above the head of the subject.
The audio levels of the clips. The audio levels should be high. But
not reach red, this can be indicated by your camera. That is, you should ensure that audio levels are high, but not too high.
Lastly, watch the p sounds. Try not to hold the camera too close to your mouth; this will prevent you from creating a loud puff. Instead, hold it about 6 inches away from your mouth.
Video Post Production
Capture. This is where you move all your footage from your camera to your computer’s hard disk. This can be done in 3 ways;
Capture all the footage on a single file located on your computer’s hard disk. You should note that, a half an hour footage might consume 10 gigabytes.
Bring it in as smaller files. You could move the footage in as 10 smaller files, which will together form a total of 10 gigabytes.
You can also use a software that will bring in the footage shot by shot. This can manually be done with Adobe Premiere. Hoever, a program like DVGate motion can automatically scan your tape, find where every shot starts and where it ends, and finally bring all the footage in. Each shot will be located in a different file when all this is done.
AVI and MOV files. The capture process will create AVI (on your PC) and MOV (on the Mac) files on your hard disk. The files will contain your footage on them, frame by frame, and in the maximum possible resolution that can possibly be produced by your camera. These files will therefore be huge. Three minutes of footage may consume as much as 1 Gigabyte.
Shots. Once all your footage is in your computer, you will have to select the parts that are important to you. For example, if you are interested in including a scene in your birthday party movie that shows how the candles on the cake were being lit, you can break the scenes into three sections. Consider that you have three angles of this moment and you are in possession of three minutes of raw footage. However, in the final movie, only 15 seconds will be dedicated to this moment, you can divide the moment into three shots:
A 3 second shot that shows the match being lit.
A 5 second shot that shows a close up of one of the candles on the cake being lit.
A 7 second shots that show the whole cake with lit candles and how it is carried into a room
Out of the file containing the whole footage, you will have to find a way of marking these three little clips. This is because it will allow you to move the clips around as individual units and easily blend them into your final scene. You can achieve this by marking an IN and OUT point of the little sections that you are interested in seeing in your video. You will then incorporate these three little clips into your timeline.
The Timeline. Once you have done your shots, you will need a place where you can arrange and hook them into one piece. This place is called your timeline. You should line the shots in a sequential order, so that you can play them as a sequence.
With these three concepts, that is, capture, shots and timeline, you will be in a position to make your movie. It may not be exactly be fancy, but, it will be way better than watching a raw footage